OMG: Making Open Graph images with Astro
Let's automate creating those pesky Open Graph images.


I use Astro to create this site. You may have already figured this out by inspect the page source. Unlike a fully featured CMS, such as Wordpress or Drupal, I have to implement some functionality myself to get creature comforts. This trade-off is worth to me since I can build and render the whole site in seconds and deploy it on Vercel, Cloudflare, or Netlify as a static site with minimal resources and costs.
This post is about one such feature I wanted to add: Open Graph images.
Holding out for a hero
You may have noticed that my posts feature a hero image. These are either custom or auto-selected from prefined lists grouped by section topics using a hash of the post’s title to get an image index (perhaps a topic for another post).
If I want to be hip and modern, I also need to create an Open Graph (OG) image for each post that can be used for sharing on social media. This is time-consuming and boring to do manually (boo) so can I automate this step (TLDR, of course I can, otherwise this post wouldn’t exist, right)?
My hero image might look like this:
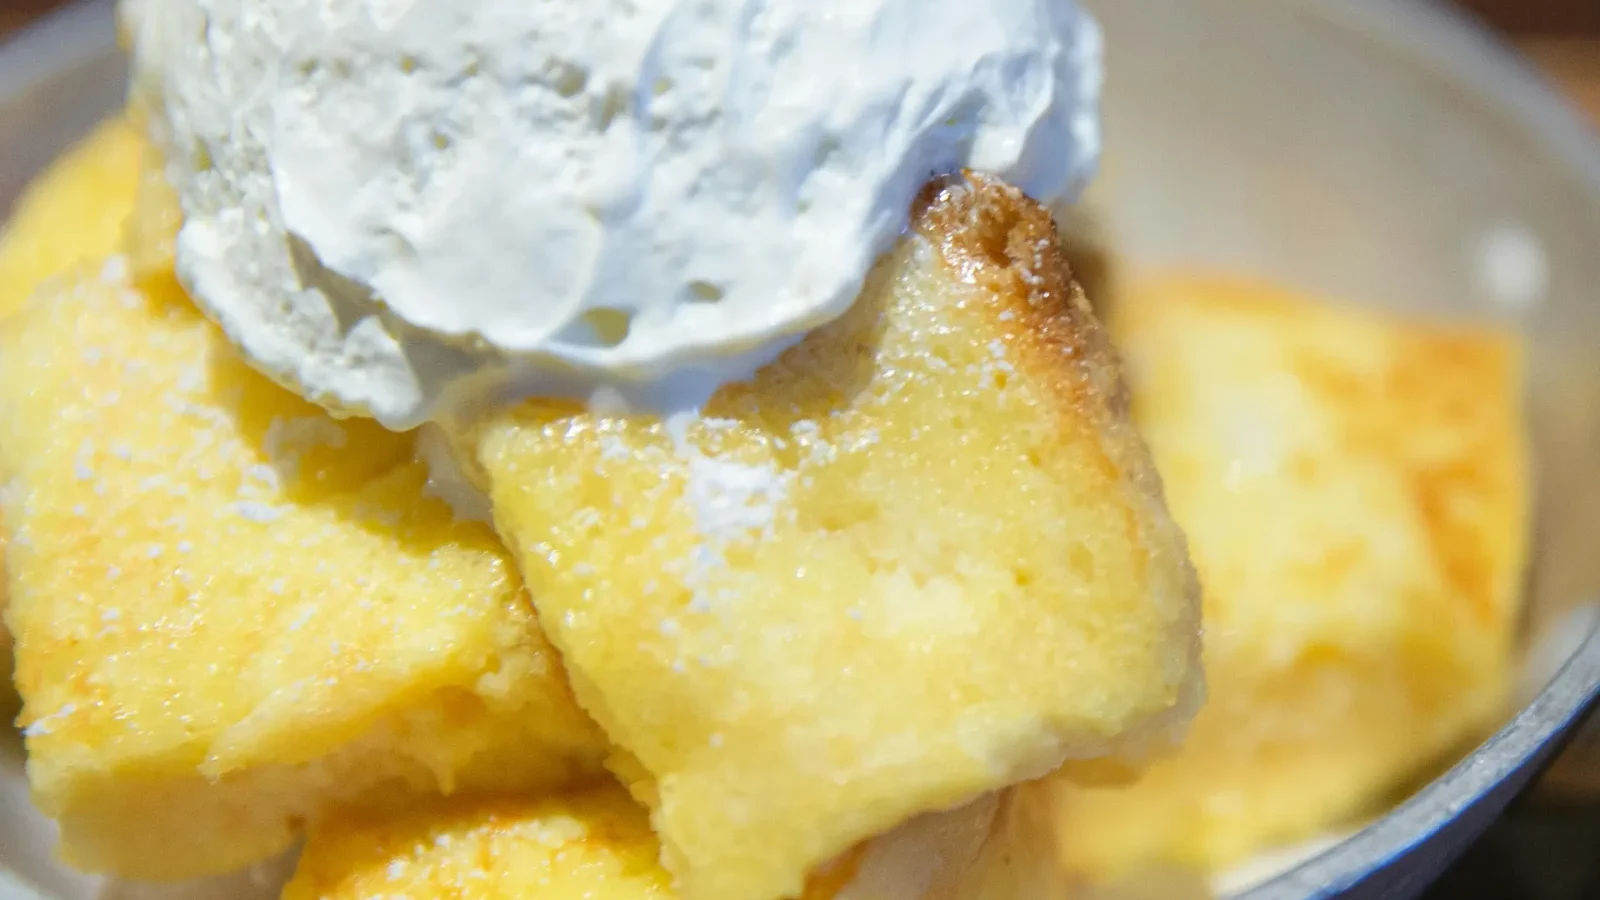
I want to turn it into 1200x630 Open Graph version that adds the post title over the image in frosted glass and looks like this:

Puppet power
I came across a post discussing a very similar concept to what I had in mind, which inspired me to write this post. Cassidy used Puppeteer to do most of the leg work. Puppeteer is a JS package to automate Chrome/Chromium by creating a headless instance of a browser and allowing it to be manipulated with an API. Hence, we can automate creating web pages, rendering them and saving images of the page very easily without having to duct tape together a janky solution using lots of separate packages. This was basically the foundation of what I needed and I reasoned that with a few tweaks, it could give me what I wanted.
Her solution was an SVG template, which is modified and then rendered to an image file. Let’s take that a step further (or maybe sideways). Since I already have my hero images, why not generate a custom web page exactly the size of an OG image and save that, no SVG required? This gives me the full power of HTML/CSS to overlay text and create whatever graphics effects I want (specifically blurred backdrops which are not properly supported in SVG).
I love it when a plan comes together
My posts are written in Markdown. The frontmatter looks similar to this:
---
title: 'The Vanilla Investor'
description: "You get what you don't pay for."
sections:
  - ['Finance']
type: post
hero: 'vanilla-cake.webp'
---
We are interested in the hero key which specifies the image I want (I have some functions that translate names to real files so that I don’t need to write complete paths in my posts, because I’m lazy).
I can use gray-matter to automate extracting the title and hero from each post which means I have what I need to generate OG images automatically.
An image is not a webpage though. I need an HTML template from which each post can be turned into an OG image:
<!-- og-template.html -->
<!doctype html>
<html>
  <head>
    <meta charset="utf-8" />

    <!-- Tailwind CDN -->
    <script src="https://cdn.tailwindcss.com"></script>

    <link
      href="https://fonts.googleapis.com/css2?family=Inter:wght@400;500;600;700&display=swap"
      rel="stylesheet"
    />

    <style>
      html,
      body {
        width: 1200px;
        height: 630px;
        margin: 0;
        font-family: 'Inter', sans-serif;
        overflow: hidden;
      }
    </style>
  </head>

  <body>
    <div class="relative h-full w-full overflow-hidden rounded-[4rem]">
      <img src="{{hero}}" class="absolute z-10 h-full w-full object-cover" />

      <!-- Glass card -->
      <div
        class="absolute right-8 bottom-8 left-8 z-20 flex flex-col justify-center gap-y-6 rounded-[2rem] bg-white/10 px-16 py-12 backdrop-blur-xl"
      >
        <h1 class="text-6xl font-bold text-white">{{title}}</h1>
        <p class="text-4xl font-medium text-white/90">{{author}}</p>
        <p class="text-3xl text-white/90">{{date}}</p>
      </div>
    </div>
  </body>
</html>
The template contains placeholders {{title}}, {{author}}, {{date}}, and {{hero}} which are replaced by appropriate values from each post. Styling is done with a mixture of Tailwind and CSS.
Finally, we need a script to actually make all of this work:
// scripts/generate-og.ts
import { getHeroImage } from '@/lib/astro/hero'
import { format } from 'date-fns'
import fs from 'fs'
import { globby } from 'globby'
import matter from 'gray-matter'
import path from 'path'
import puppeteer from 'puppeteer-core'
import { fileURLToPath } from 'url'
const __filename = fileURLToPath(import.meta.url)
const __dirname = path.dirname(__filename)
const cwd = process.cwd()
const CHROME_PATH = '/usr/bin/google-chrome'
const OUTPUT_DIR = 'public/assets/images/og'
const RX = 60
function escapeXML(str: string): string {
return str.replace(/[&<>"']/g, char => {
const escapeMap: Record<string, string> = {
'&': '&',
'<': '<',
'>': '>',
'"': '"',
"'": ''',
}
return escapeMap[char] || char
})
}
async function main() {
const files = await globby('src/content/blog/**/{*.md,*.mdx}')
const template = fs.readFileSync('src/assets/og-template.html', 'utf8')
fs.mkdirSync(OUTPUT_DIR, { recursive: true })
for (const file of files) {
const content = fs.readFileSync(file, 'utf8')
const { data } = matter(content)
const slug = data.slug || path.basename(file).replace(/\.(md|mdx)$/, '')
const outputPath = path.join(OUTPUT_DIR, `${slug}.png`)
if (fs.existsSync(outputPath)) {
console.log(`⚠️ OG image already exists for ${slug}, skipping.`)
continue
}
const title = escapeXML(data.title || 'Untitled')
const authors = data.authors
const rawDate = data.added ? new Date(data.added) : new Date()
const formattedDate = escapeXML(format(rawDate, 'MMM dd, yyyy'))
let hero = getHeroImage(data.title, data.hero, data.sections ?? [])
// fix for full path
hero = `public${hero}`
// hero is webp so embed as data URI
let html = template
.replace('{{title}}', title)
.replace(
'{{author}}',
authors && authors.length > 0 ? authors.join(', ') : 'Anonymous'
)
.replace('{{date}}', formattedDate)
.replaceAll('{{rx}}', RX.toString())
if (fs.existsSync(hero)) {
// convert to png
const heroBuffer = fs.readFileSync(hero)
//const pngBuffer = await sharp(heroBuffer).png().toBuffer()
const base64Hero = heroBuffer.toString('base64')
const dataUri = `data:image/webp;base64,${base64Hero}`
const bgPath = path.join(cwd, hero)
html = html.replace('{{hero}}', dataUri)
}
const browser = await puppeteer.launch({
executablePath: CHROME_PATH,
args: ['--no-sandbox', '--disable-setuid-sandbox'],
headless: 'shell',
})
const page = await browser.newPage()
// IMPORTANT: viewport defines output size
await page.setViewport({
width: 1200,
height: 630,
deviceScaleFactor: 1, // set to 2 for retina (2400x1260)
})
await page.setContent(html, { waitUntil: 'networkidle0' })
//await page.waitForSelector('svg')
// Screenshot entire viewport (exact size)
await page.screenshot({
path: outputPath,
clip: { x: 0, y: 0, width: 1200, height: 630 },
omitBackground: true,
})
console.log(`✅ Generated OG image for ${outputPath}`)
await browser.close()
}
}
main()This script can then be made to function through packages.json:
"scripts": {
    "generate:og": "tsx scripts/generate-og.ts",
  }
// ... rest of packages.json
We can now run pnpm generate:og to create OG images. I do this on my workstation just before I push site updates to production so that images are added into my repo without having to run this on a remote system (I’m not a huge fan of making everything serverless, fine in principal, but really a way to bilk people for build minutes in practice).
Let’s breakdown some of the key parts of the script:
const files = await globby('src/content/blog/**/{*.md,*.mdx}')
const template = fs.readFileSync('src/assets/og-template.html', 'utf8')
We want get all the posts in an array so we can iterate over them and load the HTML template into a string so we can manipulate it.
let html = template
  .replace('{{title}}', title)
  .replace(
    '{{author}}',
    authors && authors.length > 0 ? authors.join(', ') : 'Anonymous'
  )
  .replace('{{date}}', formattedDate)
  .replaceAll('{{rx}}', RX.toString())

if (fs.existsSync(hero)) {
  // convert to png

  const heroBuffer = fs.readFileSync(hero)
  //const pngBuffer = await sharp(heroBuffer).png().toBuffer()
  const base64Hero = heroBuffer.toString('base64')
  const dataUri = `data:image/webp;base64,${base64Hero}`

  const bgPath = path.join(cwd, hero)

  html = html.replace('{{hero}}', dataUri)
}
We need to replace the placeholders in the HTML with real values, and take the existing hero image and encode it as a base64 image that can be embedded in the page so we don’t need to mess around getting Chrome to load images from local files (which can be a bit annoying).
const page = await browser.newPage()

// IMPORTANT: viewport defines output size
await page.setViewport({
  width: 1200,
  height: 630,
  deviceScaleFactor: 1, // set to 2 for retina (2400x1260)
})

await page.setContent(html, { waitUntil: 'networkidle0' })

//await page.waitForSelector('svg')

// Screenshot entire viewport (exact size)
await page.screenshot({
  path: outputPath,
  clip: { x: 0, y: 0, width: 1200, height: 630 },
  omitBackground: true,
})
Once our template string is updated with real info from a post, we create a new Chrome instance and load the custom HTML string (which is a complete page). The view port is set to the size of an OG image so we can can take a screenshot and save it as a 1200x630 image.
There are some other features of the script, such as a check to see if the image file already exists so that it doesn’t recreate it. One of my pet peeves with static site generators in general is the wasteful rebuilding of the same content (there doesn’t seem much incentive to fix this since longer rebuilds equals more opportunity to bill).
Post-mortem
For me, this design work was jolly good fun. It’s completely my eyes, my opinions, my attention to detail! I want to feel artistic and make it “perfect” without just relying on AI, which often gives rather bland, broken, soulless solutions to anything more complicated that a single function. Side note, try prompting an LLM for a joke; no matter how much help you give it, the jokes will be terrible, both objectively and subjectively because there is a lack of original, creative thought. It’s just regurgitating without regard as to what makes something intrinsically interesting, funny, or in this case, visually appealing.
There was a lot of trial and error with this method. You only see the finished scripts and not the various tests and fixes made along the way to get it to this state. I’m rather happy with how it turned out. One could argue it’s overkill or unnecessary for a personal blog site, but that’s rather missing the point. I learned a bunch, fixed a problem and got a solution that exactly matches my standards without compromise nor having to rely on someone else to do it for me.
Again, this is the original post that inspired all of this if you want a bit of a different take.